
In the realm of plant-based alternatives, soy milk has emerged as a popular choice for its versatility, nutritional value, and mild flavor. Whether you’re lactose intolerant, following a vegan diet, or simply enjoy exploring new culinary options, a soy milk maker can be a valuable addition to your kitchen.
These handy appliances allow you to create fresh, homemade soy milk from scratch, giving you more control over the ingredients and avoiding additives or preservatives often found in store-bought varieties. While the specific steps may vary slightly depending on the model, the general process of using a soy milk maker is straightforward and can be mastered with a little practice.
This comprehensive guide will walk you through the steps of using a soy milk maker, from preparing the ingredients to enjoying your homemade soy milk.
I. Introduction to Soy Milk Makers
A. The Growing Popularity of Soy Milk and Its Nutritional Benefits
Soy milk has gained immense popularity as a non-dairy alternative, particularly among those following vegan or lactose-free diets. Its mild flavor and versatility make it a suitable substitute for cow’s milk in various recipes, from smoothies and cereals to baking and savory dishes. Soy milk is also rich in essential nutrients, including protein, calcium, and vitamin D, making it a valuable addition to a healthy diet.
B. The Advantages of Making Soy Milk at Home Using a Soy Milk Maker
Creating soy milk at home using a soy milk maker offers several advantages over purchasing store-bought varieties. Firstly, it allows you to control the ingredients, ensuring you use non-GMO, organic soybeans and avoid unnecessary additives or preservatives. Secondly, homemade soy milk is typically fresher and more flavorful than store-bought options, as it doesn’t require extended shelf life preservation techniques. Additionally, making soy milk at home can be more cost-effective in the long run, especially if you consume soy milk regularly.
C. An Overview of the Different Types of Soy Milk Makers Available
Soy milk makers come in a variety of styles and sizes, each with its own unique features and capabilities. Some basic models offer simple functionality, allowing you to create soy milk from soybeans and water. More advanced soy milk makers may include preset programs for different types of milk, such as almond milk, oat milk, or rice milk. Some machines also feature additional functions, such as nut milk capabilities, cold pressing options, and self-cleaning functions.
II. Gathering the Necessary Ingredients and Equipment
A. Selecting the Right Soybeans: Choosing Non-GMO, Organic Soybeans for Optimal Quality and Flavor
The quality of your soybeans directly impacts the taste and texture of your homemade soy milk. Opt for non-GMO, organic soybeans to ensure you’re using the purest and most wholesome ingredients. Fresh, high-quality soybeans will yield the best flavor and consistency.
B. Preparing the Soybeans: Soaking or Rinsing the Soybeans Depending on the Manufacturer’s Instructions
The preparation of soybeans may vary slightly depending on the specific soy milk maker you’re using. Consult the manufacturer’s instructions to determine whether soaking or rinsing the soybeans is necessary. Soaking can help soften the soybeans, resulting in a smoother and creamier soy milk.
C. Measuring the Water: Using the Appropriate Amount of Water Recommended by the Soy Milk Maker
The water-to-soybean ratio is crucial for achieving the desired consistency of your soy milk. Refer to the manufacturer’s guidelines to determine the correct amount of water for the quantity of soybeans you’re using.
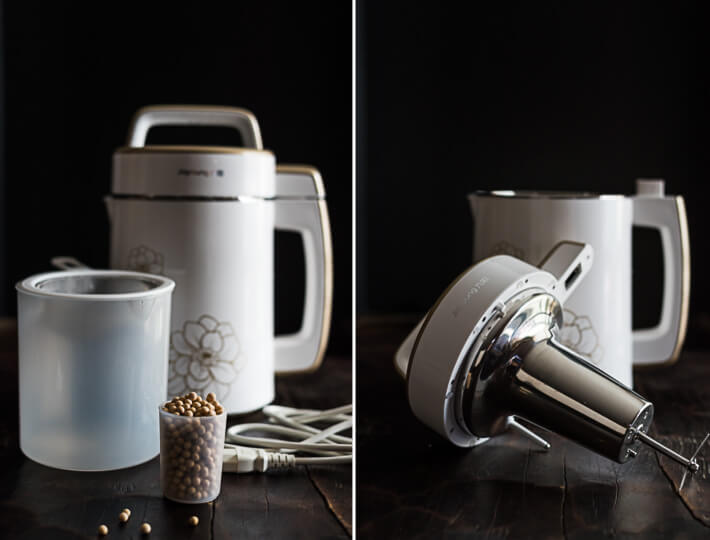
D. Ensuring Clean Equipment: Cleaning the Soy Milk Maker Thoroughly Before Each Use
A clean soy milk maker is essential for producing hygienic and flavorful soy milk. Thoroughly wash and dry all removable parts of the soy milk maker before each use to eliminate any residue or lingering odors.
III. Step-by-Step Guide to Using a Soy Milk Maker
A. Adding the Ingredients: Placing the Prepared Soybeans and Water into the Designated Container of the Soy Milk Maker
Once you’ve prepared the soybeans and measured the water, carefully add them to the designated container of the soy milk maker. Ensure the ingredients are properly placed according to the manufacturer’s instructions.
B. Selecting the Desired Program: Choosing the Appropriate Program for Soy Milk from the Machine’s Options
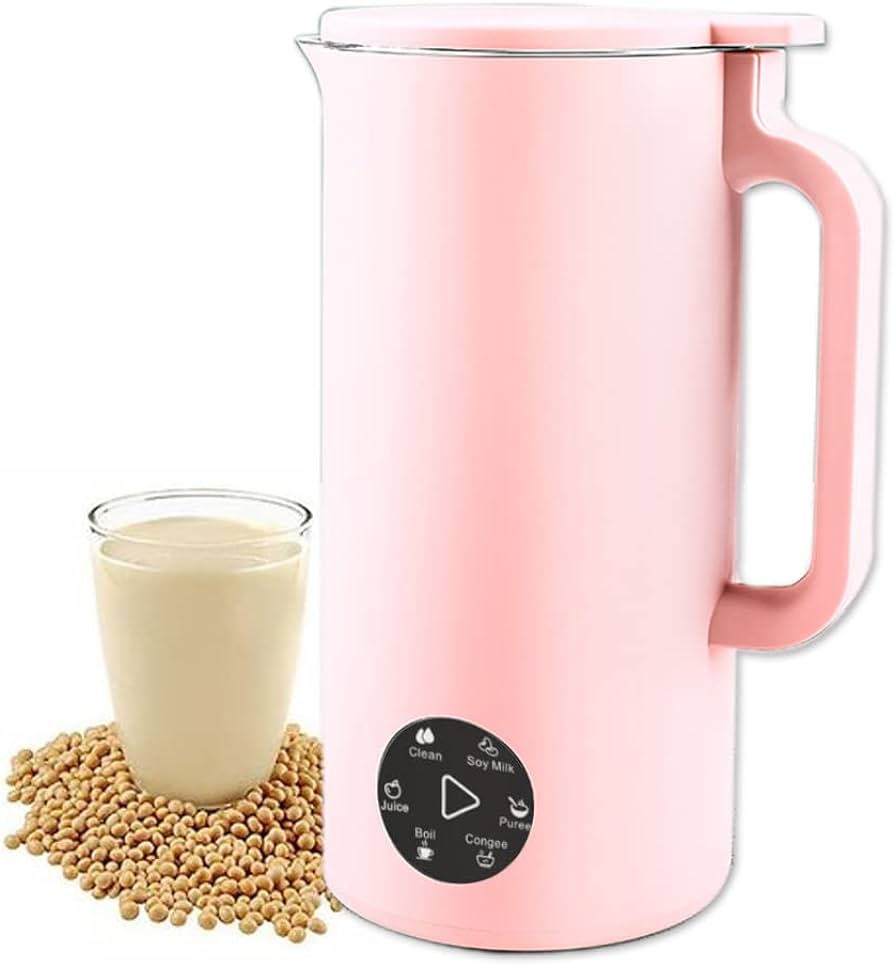
Most soy milk makers offer a variety of pre-programmed settings for different types of milk. Select the “Soy Milk” program or the appropriate setting for creating soy milk.
C. Starting the Soy Milk Making Process: Activating the Soy Milk Maker to Begin the Heating, Blending, and Filtering Process
Once you’ve selected the desired program, activate the soy milk maker. The machine will begin the process of heating, blending, and filtering the soybeans and water to create soy milk.
D. Monitoring the Progress: Observing the Soy Milk Maker as It Cycles Through the Different Stages of the Process
While the specific timing may vary depending on your model, the soy milk maker will typically cycle through several stages. You may hear a grinding noise as the machine blends the soybeans. The sound might become quieter as the mixture heats and simmers. Finally, the machine will likely emit a signal or sound to indicate that the soy milk making process is complete.
E. Pouring and Enjoying the Soy Milk: Once the Process is Complete, Carefully Pour the Freshly Made Soy Milk into a Glass or Container
Once the soy milk maker has finished its cycle, carefully pour the freshly made soy milk into a glass or container. You may want to use a strainer to remove any remaining soybean pulp, especially if you prefer a smoother consistency.

IV. Tips for Making the Perfect Soy Milk
A. Using Fresh, High-Quality Soybeans: Fresh, non-GMO, organic soybeans will yield the best flavor and texture. Opting for high-quality ingredients is key to creating delicious homemade soy milk.
B. Adjusting the Water-to-Soybean Ratio: Experimenting with Different Ratios to Find the Desired Consistency and Thickness
The water-to-soybean ratio plays a significant role in the final consistency of your soy milk. If you prefer a thicker and creamier soy milk, you can use slightly less water than the recommended amount. Conversely, for a thinner consistency, add a little more water. Experiment with different ratios to find your perfect balance.
C. Straining the Soy Milk for a Smoother Texture: Passing the Soy Milk Through a Fine-Mesh Strainer Can Remove Any Remaining Solids
Straining your soy milk through a fine-mesh strainer can help remove any remaining soybean solids, resulting in a smoother and creamier texture. This step is particularly recommended if you prefer a silky-smooth consistency in your soy milk.
D. Sweetening to Taste: Adding Natural Sweeteners Like Maple Syrup or Honey If Desired
Homemade soy milk has a naturally mild and slightly sweet flavor. If you prefer a sweeter taste, you can add natural sweeteners like maple syrup or honey after the soy milk is made. Adjust the amount of sweetener to your preference.
E. Refrigerating or Storing Promptly: Storing Homemade Soy Milk in the Refrigerator for Up to 5 Days or Freezing for Longer Storage
Freshly made soy milk can be stored in the refrigerator for up to 5 days. For longer storage, you can freeze the soy milk in airtight containers. Frozen soy milk can typically last for several months. Remember to thaw frozen soy milk in the refrigerator before using it.

V. Troubleshooting Common Issues
A. Soy Milk is Too Grainy: Adjust the Water-to-Soybean Ratio or Strain the Soy Milk More Thoroughly
If your soy milk has a grainy texture, it could be due to an insufficient water-to-soybean ratio or the presence of some remaining soybean solids. Try adjusting the water-to-soybean ratio in your next batch, or strain the soy milk more thoroughly to remove any remaining solids.
B. Soy Milk is Too Thick: Add More Water or Blend for a Shorter Duration
A thick soy milk might indicate using too little water or blending for an extended period. To achieve a thinner consistency, add a bit more water in your next batch. Alternatively, if you prefer not to adjust the water ratio, you can try blending the soybeans and water for a shorter duration.
C. Soy Milk is Too Thin: Add Less Water or Blend for a Longer Duration
Conversely, if your soy milk is too thin, you might have used too much water or blended for an inadequate amount of time. In your next batch, try using slightly less water or blending the mixture for a longer duration to achieve a thicker consistency.
D. Soy Milk Has a Burnt Flavor: Ensure the Machine is Clean and Not Overheating
A burnt flavor in your soy milk could be caused by an unclean machine or overheating. Make sure to clean the soy milk maker thoroughly after each use. Additionally, ensure the machine is functioning properly and not overheating during the soy milk making process.
E. Soy Milk Has an Off Flavor: Use Fresh Soybeans and Clean Equipment
An off flavor in your soy milk might indicate using old or expired soybeans. Always use fresh, high-quality soybeans for optimal results. Additionally, ensure the soy milk maker is clean and free of any lingering odors or residue from previous uses.